
 by Geralt on Pixabay
Personalization is one of the key features to be able to tweak the Microsoft Dynamics 365 Finance and Operations to the preferences of individual users. It will even help them to be more productive. Some personal options, like the language and date, time and number format can be managed on the User options page. This is also the page from where Usage data can be cleared. Quite often, some predefined values need to be controlled by a system administrator. Or in case of certain issues, an administrator would need to review and reset certain usage data. How can an administrator access these details? This question will be answered in this post.
Manage user options
In the past, I wrote about the User options on my blog about Personalization. It was written from the point of view of a business user. The same information can be managed by a system administrator. The steps are quite easy.
- Navigate to System administration > Users.

- Select an user for whom the options needs to be managed.
- On the Action menu bar, click User options.
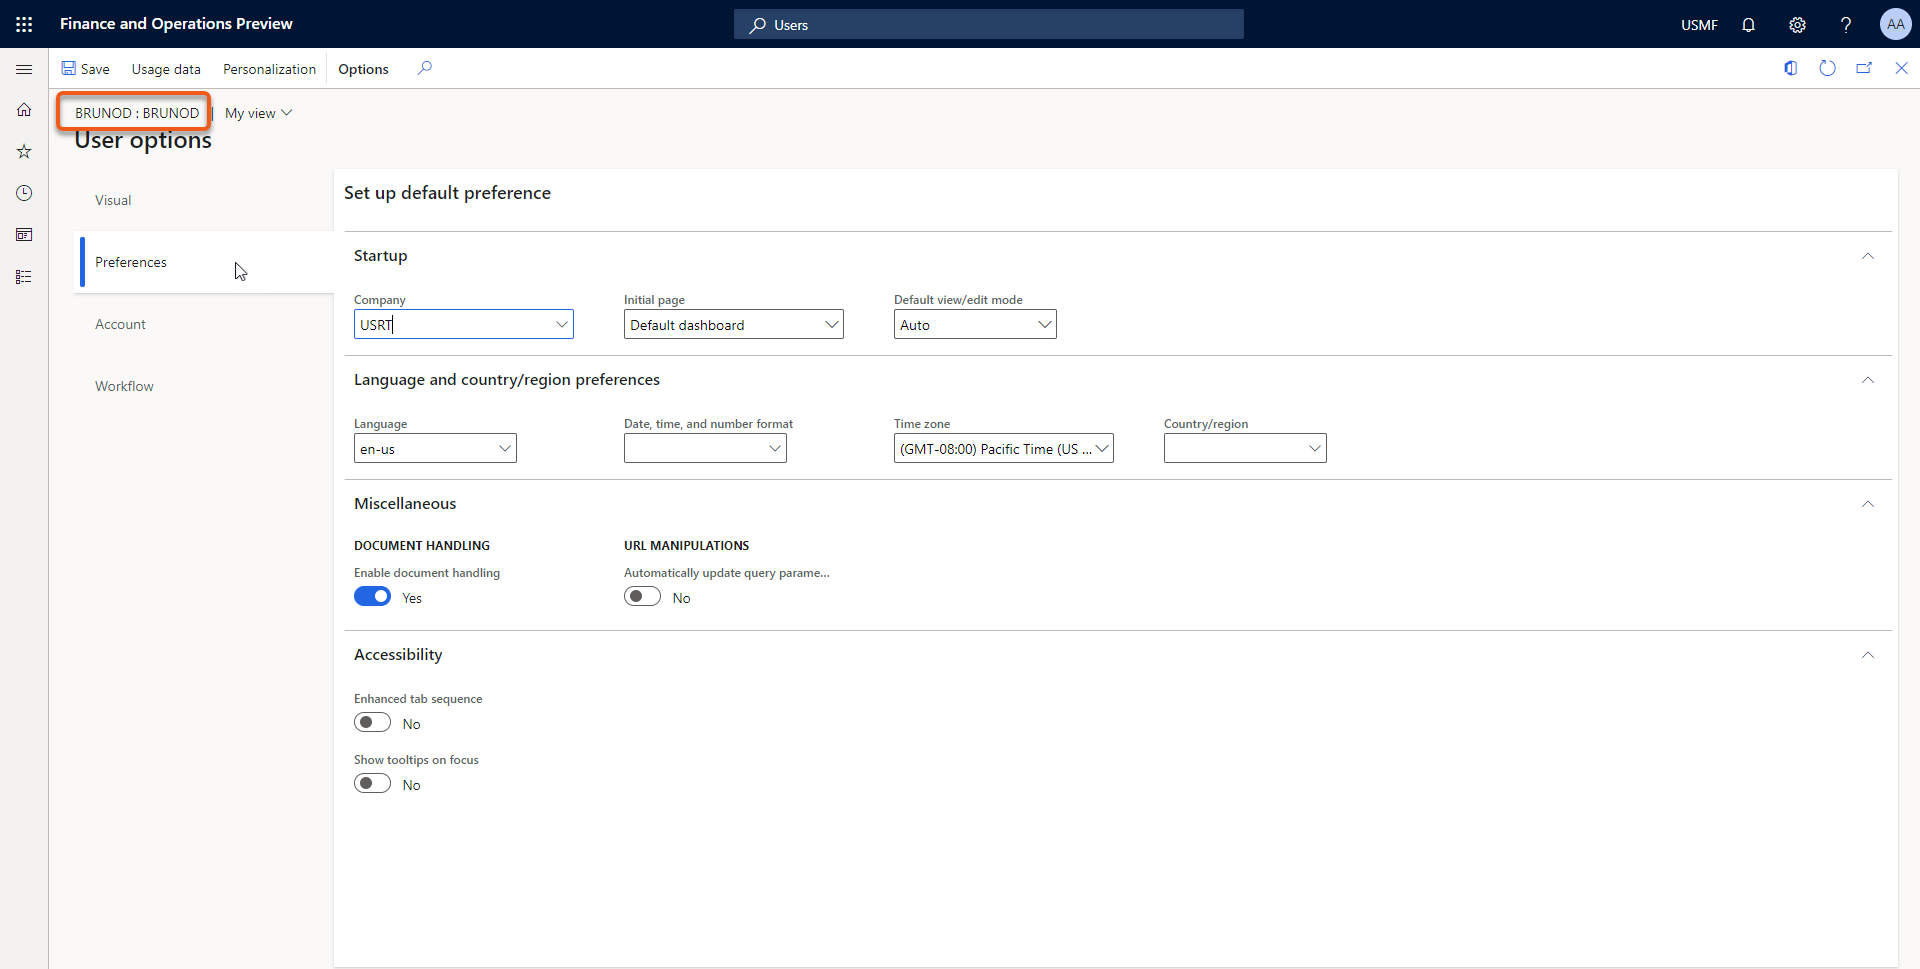
- Now you can manage settings for the selected user like setting a startup company and language. Via the action menu bar, you can also manage the Usage data.
Mass update user options
Some information available on the User options page can be updated via the Excel add-in or Microsoft Power Automate. A data entity has been provided by Microsoft out of the box. With help of the User information data entity, you can mass update data.
- Navigate to System administration > Users.
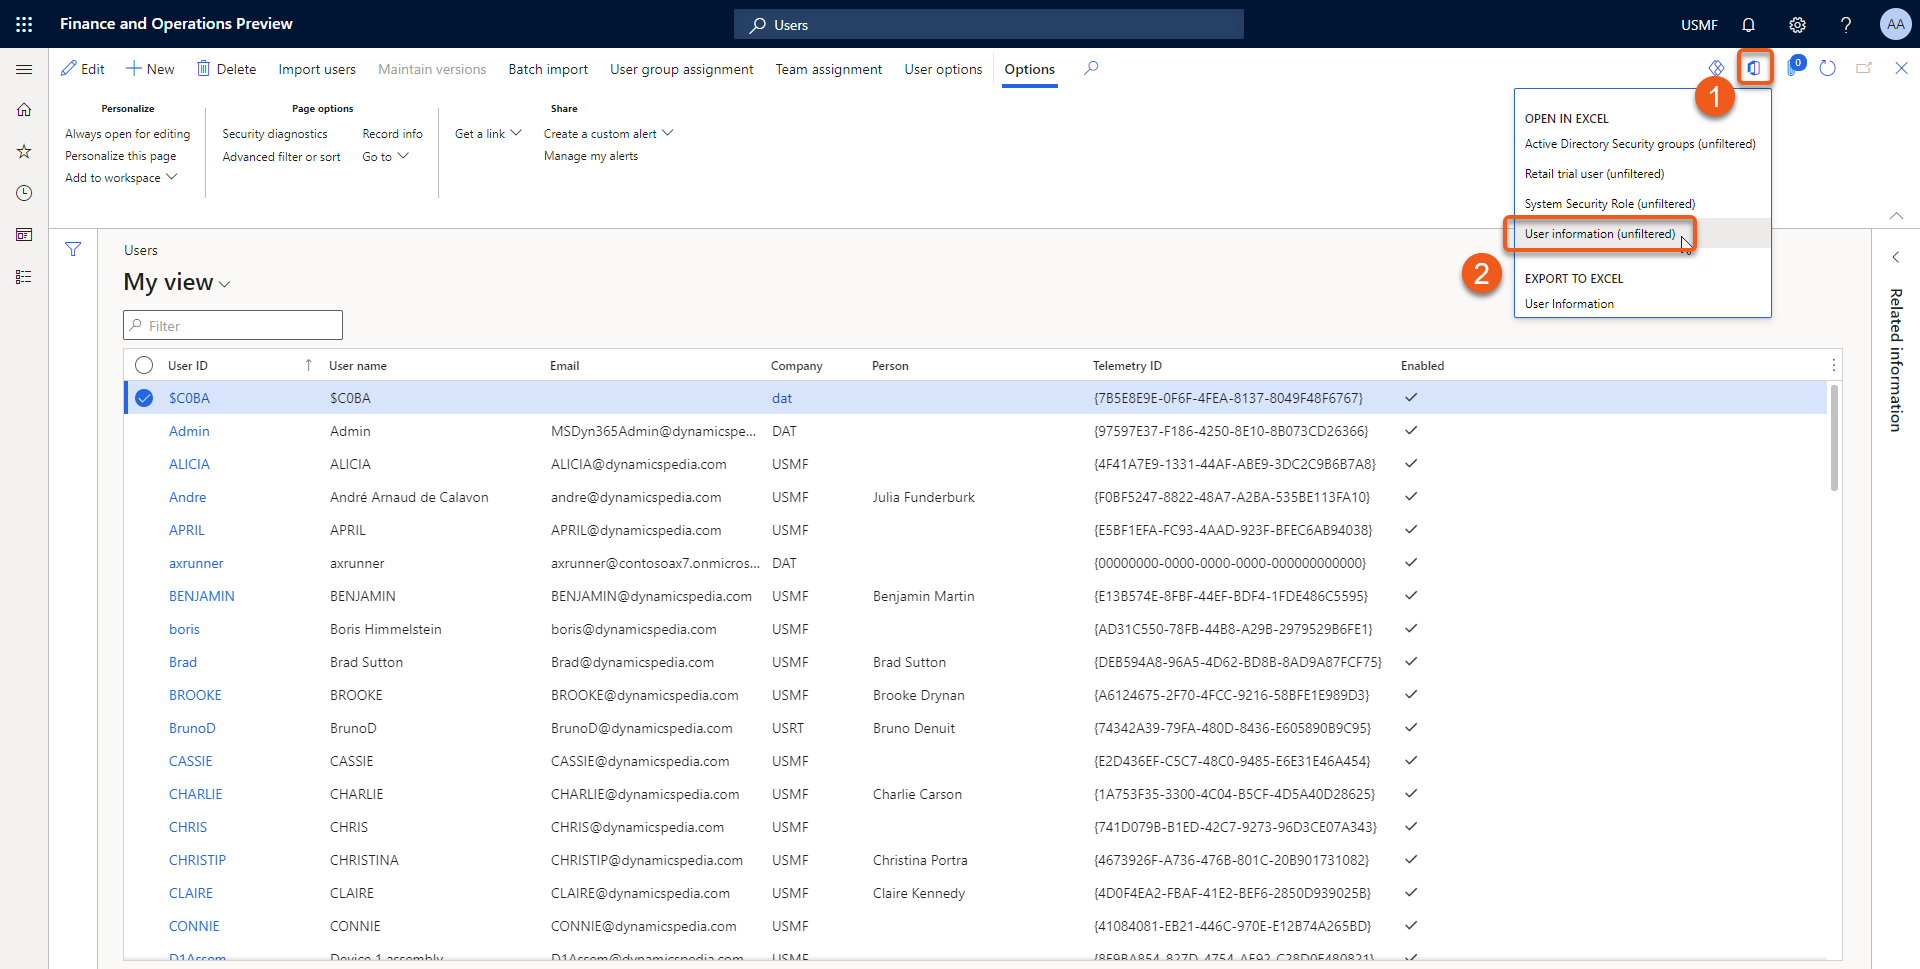
- On the action menu bar, click the Office icon. The application might be responsiveness when some data will be loaded the first time for caching purposes.
- Then choose the option User information (unfiltered) in the Open in Excel section.
- A dialog will appear. Choose for download or one of the storage options.
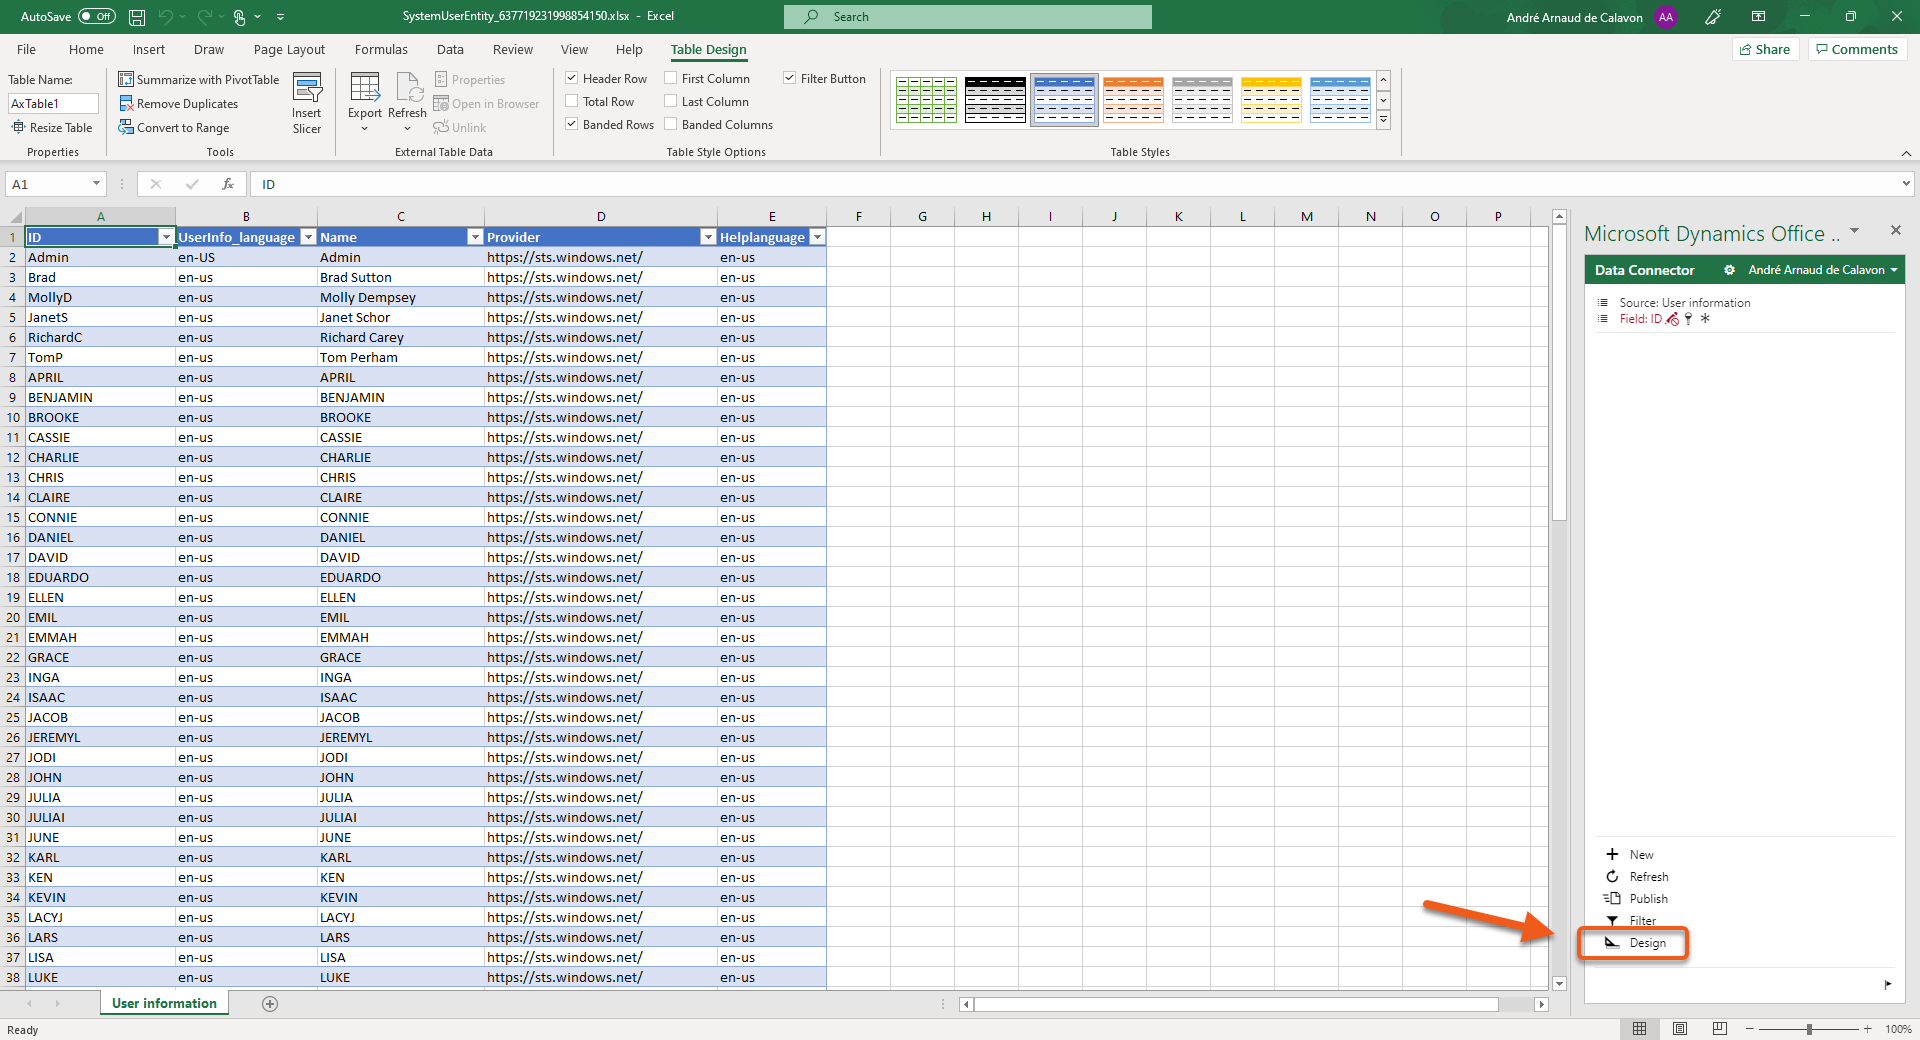
- Open the Excel file. You will notice some columns selected by default, but there are also fields for the user options available.
- On the Microsoft Dynamics Office add-in panel, you can click the Design button.
- When you get the Design page with the User information entity, click on the pensil button for editing.

- You can add fields related to the personalization, like Company and PreferredLocale (Date, time and number format), but also the Enabled field.
- When you have selected your required fields, click the Update button to make your selection effective.
- On the Design panel, click Done.
- Click Refresh to read the details of the new and changed columns.
- You can now change values in various columns for several different users.

- When you completed all required changes, you can click the Publish button to update the changes to Dynamics 365.
I do hope you liked this post and will add value for you in your daily work as a professional. If you have related questions or feedback, don’t hesitate to use the Comment feature below.
That’s all for now. Till next time!

 Image by Wilfried Pohnke from Pixabay

 Image by Gerd Altmann from Pixabay
 Image by DarkWorkX from Pixabay

Hello,
I have designed a workspace and added links inside the workspace for eg. custom workspace and it has links for customer master, vendor master and this workspace i want to make it visible to all the users, one way is to go to each user and personalize the workspace and create it, the above will work for workspaces as well?
thank you
Hi Naveen,
The administrator would not be able to do this specific personalization for the user using the User options form. Personalized workspaces can be copied to other users using the Personalization form in the System administration menu.